Learn how to create a gradient brush in Adobe Illustrator with our guide. From selecting the right colors to adjusting the brush settings, our guide covers all the essential steps for creating a gradient brush that adds depth and dimension to your illustrations.

Make a blend. Use any shape. Create three squares of different colours. Select them all, then navigate to Object>Blend>Make. Double- click on the Blend tool and choose “Smooth Colour” as the spacing method, then create the blend.

Choose the blend and the path you want it to follow, and navigate to Object > Blend > Replace Spine:
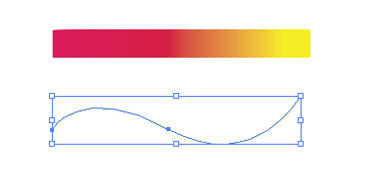

Based on the path it may seem blocky.

Select the path and double-click the Blend tool. Select the Align to Path option under Orientation (it’s the second icon). The square will follow the curve of the path. Now, take the blend and drag it into the Brushes panel. Select “New Art Brush”. Leave everything in the Art Brush Options box as it is, or experiment with different colorization settings.
Paint the brush.


Note that if you expand the brush you will end up with hundreds of the original shapes you used.


