This guide will help you master the offset frame and take your illustrations to the next level. Create a professional-looking design using the Offset Path tool, and understanding the different settings and options available.
If you are looking to change an offset box with text when you change the point size or add to the text, you rely on this technique. Add dynamic frames to objects. This will give flexibility especially when applied to type. You can change the text and the frame updates automatically. To build an effect, choose the items that will be framed and select Add New Fill from the Appearance palette menu.

The item will appear on the top portion of the present attributes. You might want to drag it below the stuff you want to frame. If it is text or a group of items place it below the Contents or Characters in the Appearance palette. Select the Fill in the Appearance panel and change its colour to something different from the text by going to the colour palette (Window>Colour).

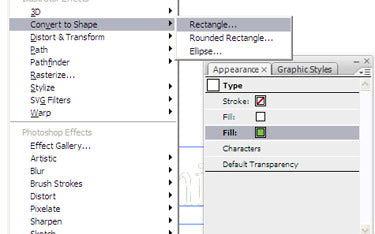
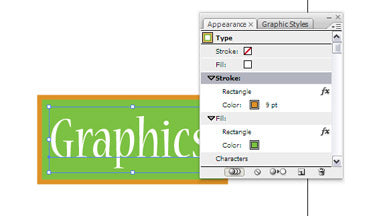
Choose Effect>Convert to Shape>Rectangle (or Rounded Rectangle or Ellipse). Enter a value for an offset amount. Using a relative amount is best since the frame grows with the content. When you added the new fill, a new stroke was added as well with a colour of None. Click on the Stroke in the Appearance palette and add a colour to it Apply the Convert to Shape effect to the stroke as well to move the stroke to the shape instead of the text. You can quickly apply the last effect used by pressing Command-Shift-E (PC: Control-Shift-E).

You can see that when you resize the text the size of the text will also change. When the effect is applied the white space around the character is used to determine the objects size. If you change the text to outlines, the space will be thrown out and the offset will be based on the new smaller size.


When you change the text, the frame expands or contracts to match.


