Spiral tool is one of the most fascinating tools in Adobe Illustrator. This is mainly because of the mysterious terms such as Radius, Decay, and Segments used in its dialog box. This is one such tool that requires good understanding to know about each of the options mentioned above. So, let’s travel through some simple steps to know the dialog box of the Spiral Tool better.
STEP 1: Opening a Mystery
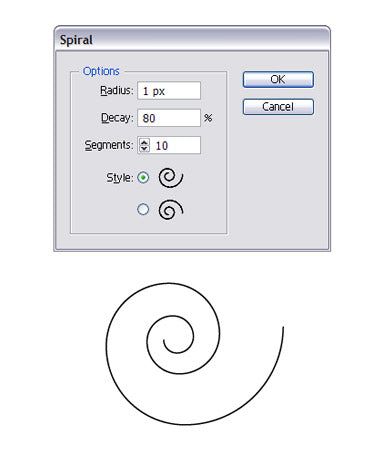
Choose the Spiral tool. Click anywhere in the work area to open the dialog box. Like many other tools in Illustrator, you cannot just click and drag on the page to create a Spiral. To create one, fill in the settings shown in the dialog box above and click OK. Choose 1″ for the Radius since it is the simplest number to deal with and will make it easier for you to uncover the relationship between all these options. Leave all other numbers at the defaults – Decay at 80% and Segments at 10.
STEP 2: The Radius
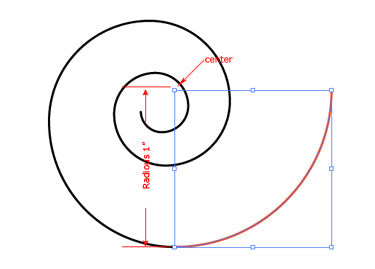
Let us start with Radius. Radius is the not the same as in other drawing tool dialog boxes. The Radius is actually the width or height of the first segment. Select the segment with the Direct Selection tool (white arrow) and just Copy (Edit > Copy) and paste it (Edit > Paste). Check the Info palette or the new Control palette. Both the width and height (or the Radius) of the segment will be 1″ measured from the inside of the arc where the width and height intersect in upper left corner of the bounding box.
STEP 3: Decay
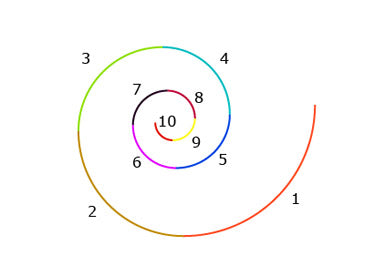
Decay is the Radius of each succeeding segment multiplied by the percent that you specified in the dialog box. In other words, if you select the second segment in the Spiral with the Direct Selection tool, then Copy and Paste it, the Width and Height should be 80% of 1″ (the Radius of the first segment) or .8″. The third segment’s radius should measure .8″ X 80% or .64″, and so on and so on through all 10 segments.
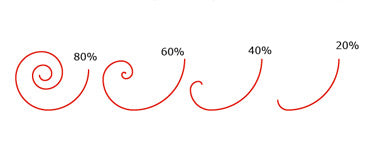
What if you change the percentage? The closer the Decay is to 100% the more circle-like (or tightly wound) the Spiral will be. The Spiral will be looser when you lower the Decay percentage and it will look like a long arching path.
STEP 4: Segments
There will be 10 segments in the Spiral. When you increase the number to 20 the spiral will continue to wind further inward toward its centre adding 10 additional segments, each with a Radius that is 80% of the previous segment.
STEP 5: Style
Style determines direction of the Spiral winds – clockwise or counter-clockwise.
STEP 6: Straightening Out the Mystery of Spiral
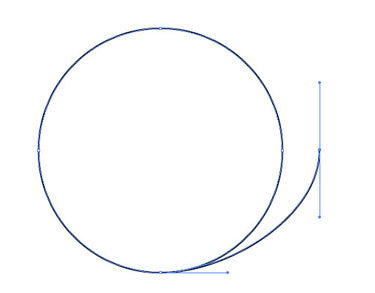
A Spiral with a Decay of 100% will like a circle but it’s a Spiral that circles straight down over the top of itself. Try this. Make a Spiral with a 100% Decay. Using the Direct Selection tool, pick any segment or anchor point in the object and move it. You will uncover other parts of the Spiral hidden underneath what you just moved.


